Friday, October 22, 2010

Google Spreadsheets for Voting Collection


Our middle school ran elections this week for Student Council officers. The Advisor of Student Council and I worked up an idea where videos of the candidates giving speeches would be placed in the shared drive so staff could show the videos during Home Room. Votes would be taken and then staff would enter the votes per candidate on a Google Spreadsheet. This went over very well so I wanted to share how we set up the Google Spreadsheet so others could use this idea in the future.

First up, you need a FREE Google Account. The video below shows how to sign up for a Google Account.


Once you have a Google Account, you can access the Google Docs suite by going to http://docs.google.com or if you're already logged in and at a Google site, you can find "Documents" on the top left menu of the page as shown below.


When logged in to Google Docs, create a new spreadsheet by going to CREATE NEW > SPREADSHEETS.

Set up and create the spreadsheet as you would like it to look. An example of what this could look like is below. A tip for creating a spreadsheet like this is to also use the FREEZE ROWS and FREEZE COLUMNS options under the TOOLS drop down menu. This will help if staff moves around in the spreadsheet so their names are still shown and so the candidates at the top are always shown.


To the right of the file name at the top of the spreadsheet is a link that says "Private to only me." Clicking this link shows who has rights to the file. Click CHANGE to change the rights as shown below. We chose the setting "Anyone with the link" which allowed an edit check box to appear at the bottom. We checked the "Allow anyone to edit (no sign-in required)." Choosing this made it so any teachers we emailed the link to could edit the spreadsheet without having to have a Google Account.


Clicking SAVE will take you back a window where there is now a web address that can be COPIED or you can click on links to share the link via GMail, Buzz, Facebook, or Twitter. Getting the link out to staff was easy; we sent the link to our teacher email list and explained that teachers would enter the votes at the end of the day.


From what we could tell, only the "owner" of the file can get to this link. Editors can not pass on the link to others.

As a tip, I sent out a quick message to the staff letting them know that when they entered their information, they did not necessarily have to click a SAVE button. I attached the screenshot below and explained that the spreadsheet saves every few seconds as data is entered. If all the teacher's data was there and the save area shows "SAVED" and it says "a few seconds ago," then all is good!


It was great to pull up the spreadsheet while teachers were entering their data! According to this article on the Google Docs help area, 50 people can edit a file at once.

This use of Google Docs worked great! My hope now is that teachers who weren't familiar with this type of use of Google Docs will be interested in using this again or possibly using this with their own classes.


Wednesday, October 13, 2010

Public Domain Clipart Website I Love!

In this post, I want to share a tool that I've been using almost daily when creating handouts, lessons, presentations and the like. OpenClipArt.org is a site where users (anyone) can create and upload clipart to be used by others for absolutely free. It's a total community of those that just want to create and share images. You might be thinking, "how is that possible? Don't you have to cite where you got artwork from?" You do, but NOT if it's in the public domain. Here's a part of the OpenClipArt.org ABOUT page.

Another great benefit to using this site is that artwork is uploaded as PNG (think bitmap image like a .jpg or .bmp so you can use it in Word, PowerPoint or the like) or SVG (vector images for those that know how to use them in programs like Illustrator or Corel Draw). OpenClipArt.org offers a wiki and forum area for discussion with other artists.

If you're interested in making your own clipart, they link to directions on how to do this using Inkscape (a FREE and open source graphic tool)

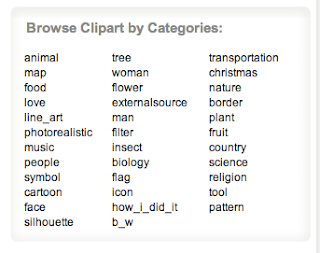
So, how do you use the site? There's a few ways to find clipart. One way is to use the "Browse By Categories" box that is on the right side of the screen:

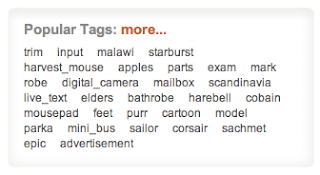
Right below that is an area for the "most popular tags" that uploaded clipart has been tagged with. Clicking on a tag brings up results that have that tag.

I personally find that the quickest and easiest way to find clipart is to use the SEARCH BAR at the top right of the site...


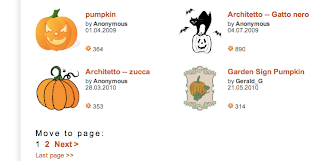
Search results come up...


...and you can either click on a result you like OR you can go to the bottom and see if there are more pages available with more results like in the example above.

From here, I click on my result to go to just that piece of clipart I like.


At this point, there are a few options you can explore depending on what you want to do:
  • If the image is big enough on this page, I will just click and hold on the image with my mouse and drag it to my Word document or PowerPoint slide or desktop (using a Mac). If using a PC computer, you can right-click on the image and choose to COPY. I'm done and can go on my way. This format is PNG.
  • If you need the image bigger, you can click the "Lossy: PNG" button and that will take you to a "full size" version of the image the way it was uploaded to the site by the creator.
  • If you are a graphics person and need the vector format, you can click the DOWNLOAD SVG button and get a copy of the file in SVG mode that you can take and altar and do what you want with
I really enjoy the FRESHness of the clipart (especially TECHNOLOGY clipart). The clipart is not just old, static images we've all seen a million times. Try this out as a way to spruce up your next project, assignment, presentation or lesson! Share and show this to students as well! They will enjoy the freshness of finding new clipart to have access to!

Leave some comments on if you like, don't like or any tips and tricks you've found! OpenClipArt.org

Saturday, October 9, 2010

Using Google Voice Search To Create My To Do List

I am always looking for new ways to better organize myself. Lately, I've been using my phone (Sprint EVO), which runs on the Android operating system along with some of the built in features to create and keep my To Do List. I haven't found a really good "to do list" app that's simple, quick and efficient enough for my liking so I created an alternate way to keep my items organized. Explained easily, I tap my phone, talk into it as as "note to self" and send this as a transcribed email that automatically filters to a specific folder/label in my email. This folder/label is then set up as a shortcut on my phone for quick access. Still with me? :)

Setting this up involves using Google Voice Search and setting up your GMail Account to filter some messages to a specific "label." Read on and follow these steps if you wish to set up the same thing. Here's a step-by-step on how to set this up:

1. Update Google Voice Search. Recently, Google released an update to their Google Voice Search that includes more actions. You need to go into the market and download the newest Google Voice Search to get these actions, one of which is the "Note To Self" action. (This blog post from Google explains some of the new Voice Actions that were added. There's also a video that walks through and shows some good uses for these new actions.)


2. Place Either Google Voice Search App or Google Search Widget On a Screen. I personally have the Google Search widget (above) on my home screen for quick access since the microphone is right there. Great for a quick tap while driving and/or to record a "Note to Self."


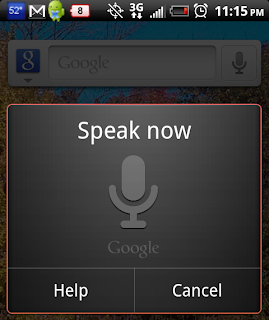
3. Record Your First "Note to Self." After installing the updated Google Voice Search, tap the microphone icon and the "Speak Now" window will appear. Start your speech with "Note to self." Example: "Note to self create powerschool screencast." The speech will be transcribed.

4. Double check transcription and send. The transcription of what you said will appear. You can manually tap on any part of the text to type and correct anything that's not properly understood. Click SEND when finished. This will go to your G-Mail email account.


G-MAIL SETUP
The second part of this process is setting up G-Mail correctly. This part needs to be completed on your computer.


1. Filter The "Note To Self" Email. Once you receive a "Note To Self" email from yourself, click on the message to see it. Click the MORE ACTIONS button (top right) and choose FILTER MESSAGES LIKE THESE.


2. Add "Note To Self" to Search Criteria. The first Filter settings you see relate to the origin of the message. Verify your email address is in the FROM area. In the SUBJECT area, type in Note To Self. This will make it so messages from "you" with the subject "Note To Self" will have this filter applied. Click NEXT STEP.


3. Choose Action Settings. On the next screen, you choose what should happen to the message. Check the following:
  • Skip the Inbox (Archive It)
  • Mark As Read
  • Apply the Label
  • Also apply this filter to xx conversations below (checking this will make it so any other "Note To Self" emails will also have these actions performed. If this is your first "Note To Self" email, checking or unchecking this option doesn't really matter.)
After checking APPLY THE LABEL, click the drop down menu next to this choice and choose NEW LABEL. Title the label Note To Self. Click CREATE FILTER when finished.

The G-Mail setup is now complete. Any messages that come to G-Mail from your email address with the subject Note To Self will now automatically skip your inbox and sort to the label Note to Self. Having the email "marked as read" also makes it so the label doesn't show a number for unread messages.

ADD G-MAIL LABEL SHORTCUT TO YOUR PHONE
Follow the steps below to add a shortcut for your Note To Self label in your email to make your "to do list" easy and quick to access.


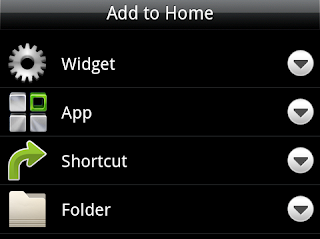
1. Add Shortcut. Click the + button on your phone home screen (or whatever button you press to add a shortcut to your phone screens). Choose SHORTCUT.


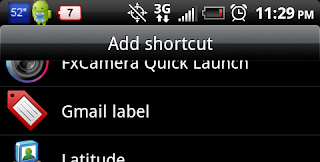
2. Choose Gmail Label.

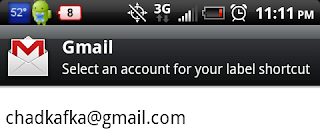
3. Choose Gmail account. If you hare more than one Gmail account associated with your phone, choose the one where your Note To Self emails are going.


4. Choose Note To Self Label. After choosing the email account, scroll down and find the Note To Self label and tap it.


5. Name the Label Shortcut. You can now name your label shortcut whatever you want. I chose to name mine To Do List.


6. Place Label On Screen. You can now place the new label where you want.


7. What's it look like? You have now set up a fully automated system for keeping track of your To Do List items. As you send yourself Note To Self emails, you can quickly access them by tapping on your To Do List G-Mail label. You can also click the checkmark next to any messages and DELETE them as you complete your tasks. (Note: Messages do stay in chronological order in the order in which they were received.)

DISCLAIMER: As you record your Note to Self items, you will get looked at funny by others. All part of using the tech in a way that's GEEKY! :)

That's pretty much it. A little involved process but the payoffs for me were worth it. Using this as my TO DO LIST doesn't offer some features like some other apps (color coding, prioritizing, categorizing, etc) but I just wanted something simple and quick. I personally like being able to just "say" the Note To Self item into my phone to save time. 90% of the time, the transcription is spot on. Please leave comments below if this helps you out or if you have other tips to offer related to this post.

Friday, October 8, 2010

Using Quicktime Player To Make ScreenCasts

The new version of Quicktime Player comes with a GREAT feature that I have been using a lot lately. I learned about this at the Apple Academy I attended in August. You can create ScreenCasts (or Screen Recordings) for demo purposes in regular (free!) Quicktime Player. Here's some getting started points and tips for using.


To get started, launch Quicktime Player. Go to FILE > NEW SCREEN RECORDING. This will bring up a Recording widget (below). Before pressing record, you can click the arrow to the right of the record button and choose the microphone you will be using. You can chose "Built in Microphone" if just using the microphone on the Mac. If you connect a microphone, the microphone will display here.


As soon as recording starts, a "Stop Recording" button will appear in the top title bar of the desktop. This is where you will click to end the recording.


IDEA: I usually have a PowerPoint screen that I go to as a "title slide" to start off my screencast. I trim out the very beginning and very end of the video after I'm done recording (more below). When I go into presentation mode in PowerPoint, I show my title slide and then press COMMAND+H to "hide" PowerPoint so it goes to my desktop or whatever program is open that I am making a screencast for.

After clicking the Stop Recording button, the video is instantaneously done. I used to use Snapz Pro X for screen recordings and the rendering process when finished with the recording would take way too long. The video saves as "Screen Recording.mov" to the MOVIES area of the Mac by default (see below)

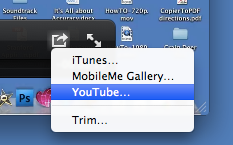
When the movie is open, you can TRIM the video from the sides and then save the video. Do this by clicking on the arrow icon on the bottom right of the window. From here you can choose to SHARE the file to online services like MobileMe or YouTube. You can also choose to TRIM the video.
Choosing to TRIM brings up the yellow sliders similar to iMovie where you can drag in from the sides to trim out what you don't need at the beginning or the end. Make sure to SAVE or FILE > SAVE AS your video when finished trimming.


And that is how you make a screen recording. I try to be as concise and to the point as possible to keep the video as short as possible. Ask yourself if you would take the time to watch the video you made.

One glitch I have come across and I'm looking for some help in fixing -- When I have been uploading my videos to YouTube, the video is going faster than the audio in the rendered YouTube video. As an example, a 3:39 movie I upload will render as 2:16 so the audio does not match the video. To try and fix this, I have opened the video in Quicktime Player and gone to FILE > SAVE AS and tried changing the format to things like iPhone, Apple TV, 480p, 720p, 1080p, etc. I haven't found one specific format that works. Please leave a comment below if you have found a good conversion for the Quicktime Movie that will work perfectly.

I hope this video helps you make some demos or screencasts for your staff, peers or students. I upload my demos to YouTube if you'd like to see some examples. Enjoy!


UPDATED TIP:  After a few months of playing around with this, I have found a great SPACE SAVER tip.  I record videos for my students to watch and put the videos in a folder on our STUDENT network so students can get to the videos.  The default screen recording size for Quicktime is rather large!  I was putting videos on the student network that were 200 or 300MB which can cause a lot of problems.  A way around this?  When finished with your video, go to FILE > SAVE AS and change the 'format' drop down window to COMPUTER.  This saves the video at 'computer' quality and takes out a lot of file space.  You don't really recognize the loss in quality as everything still plays fine for the students and with less file size, the changes of the videos "skipping" goes down.