

I am always looking for new ways to better organize myself. Lately, I've been using my phone (Sprint EVO), which runs on the Android operating system along with some of the built in features to create and keep my To Do List. I haven't found a really good "to do list" app that's simple, quick and efficient enough for my liking so I created an alternate way to keep my items organized. Explained easily, I tap my phone, talk into it as as "note to self" and send this as a transcribed email that automatically filters to a specific folder/label in my email. This folder/label is then set up as a shortcut on my phone for quick access. Still with me? :)
Setting this up involves using Google Voice Search and setting up your GMail Account to filter some messages to a specific "label." Read on and follow these steps if you wish to set up the same thing. Here's a step-by-step on how to set this up:

1. Update Google Voice Search. Recently, Google released an update to their Google Voice Search that includes more actions. You need to go into the market and download the newest Google Voice Search to get these actions, one of which is the "Note To Self" action. (This blog post from Google explains some of the new Voice Actions that were added. There's also a video that walks through and shows some good uses for these new actions.)

2. Place Either Google Voice Search App or Google Search Widget On a Screen. I personally have the Google Search widget (above) on my home screen for quick access since the microphone is right there. Great for a quick tap while driving and/or to record a "Note to Self."
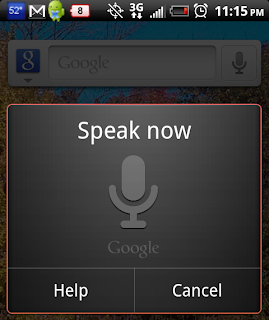
3. Record Your First "Note to Self." After installing the updated Google Voice Search, tap the microphone icon and the "Speak Now" window will appear. Start your speech with "Note to self." Example: "Note to self create powerschool screencast." The speech will be transcribed.

4. Double check transcription and send. The transcription of what you said will appear. You can manually tap on any part of the text to type and correct anything that's not properly understood. Click SEND when finished. This will go to your G-Mail email account.
G-MAIL SETUP
The second part of this process is setting up G-Mail correctly. This part needs to be completed on your computer.

1. Filter The "Note To Self" Email. Once you receive a "Note To Self" email from yourself, click on the message to see it. Click the MORE ACTIONS button (top right) and choose FILTER MESSAGES LIKE THESE.

2. Add "Note To Self" to Search Criteria. The first Filter settings you see relate to the origin of the message. Verify your email address is in the FROM area. In the SUBJECT area, type in Note To Self. This will make it so messages from "you" with the subject "Note To Self" will have this filter applied. Click NEXT STEP.

3. Choose Action Settings. On the next screen, you choose what should happen to the message. Check the following:
- Skip the Inbox (Archive It)
- Mark As Read
- Apply the Label
- Also apply this filter to xx conversations below (checking this will make it so any other "Note To Self" emails will also have these actions performed. If this is your first "Note To Self" email, checking or unchecking this option doesn't really matter.)
The G-Mail setup is now complete. Any messages that come to G-Mail from your email address with the subject Note To Self will now automatically skip your inbox and sort to the label Note to Self. Having the email "marked as read" also makes it so the label doesn't show a number for unread messages.
ADD G-MAIL LABEL SHORTCUT TO YOUR PHONE

Follow the steps below to add a shortcut for your Note To Self label in your email to make your "to do list" easy and quick to access.
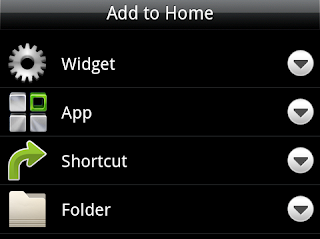
1. Add Shortcut. Click the + button on your phone home screen (or whatever button you press to add a shortcut to your phone screens). Choose SHORTCUT.
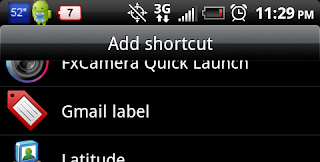
2. Choose Gmail Label.
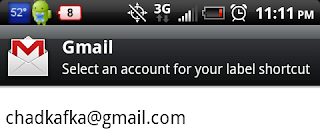
3. Choose Gmail account. If you hare more than one Gmail account associated with your phone, choose the one where your Note To Self emails are going.

4. Choose Note To Self Label. After choosing the email account, scroll down and find the Note To Self label and tap it.

5. Name the Label Shortcut. You can now name your label shortcut whatever you want. I chose to name mine To Do List.

6. Place Label On Screen. You can now place the new label where you want.

7. What's it look like? You have now set up a fully automated system for keeping track of your To Do List items. As you send yourself Note To Self emails, you can quickly access them by tapping on your To Do List G-Mail label. You can also click the checkmark next to any messages and DELETE them as you complete your tasks. (Note: Messages do stay in chronological order in the order in which they were received.)
DISCLAIMER: As you record your Note to Self items, you will get looked at funny by others. All part of using the tech in a way that's GEEKY! :)
That's pretty much it. A little involved process but the payoffs for me were worth it. Using this as my TO DO LIST doesn't offer some features like some other apps (color coding, prioritizing, categorizing, etc) but I just wanted something simple and quick. I personally like being able to just "say" the Note To Self item into my phone to save time. 90% of the time, the transcription is spot on. Please leave comments below if this helps you out or if you have other tips to offer related to this post.
Thank you! Clear explanation!
ReplyDeleteThis is great! Thanks!
ReplyDelete